The Citrix workspace client automatically assigns itself a ‘topmost’ status in Windows once it goes to fullscreen mode. Once this happens all other windows running on your Windows computer are no longer visible and can’t be accessed without switching the Citrix windows from fullscreen mode to windowed or minimized mode.
This behaviour can be annoying when you need to run certain applications locally for best behaviour, one such an example is Teams.
As a workaround I’ve developed a small application which checks all windows for the topmost flag. If a Citrix window (CDViewer) is detected with this flag the flag automatically gets removed. After removal the application adds the flag to all applications listed in the application config file (CtxNotTopmost.dll.config). The last application to receive the topmost status will always be on top of other windows.

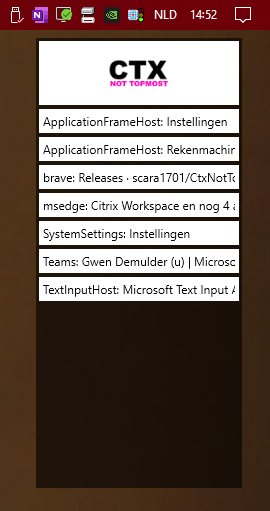
In addition to this functionality the application always displays a ‘widget’ on top. This widget lists the open windows on the local machine. Thus allowing you to bring any of those applications to the front if needed.
You can find the application which I’ve named CtxNotTopmost (I was low on inspiration) on my Github: https://github.com/scara1701/CtxNotTopmost
Use the releases page to download the most recent version of the application.
Remember, this is an early release of the application. It has been sufficient to fulfill my needs thus far.